Unlock the Power: Connect Android Phone to Projector Via USB Cable
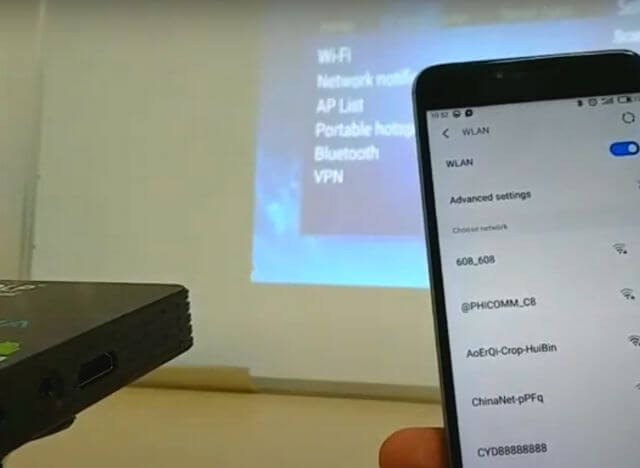
To connect an Android phone to a projector via a USB cable, follow these steps: First, make sure your phone and projector support MHL (Mobile High-Definition Link). Next, connect one end of the USB cable to your phone and the other end to the projector’s USB port.
Adjust the projector’s input source to USB, and you should see your phone’s screen displayed on the projector. If your phone doesn’t support MHL, you may need to use an HDMI cable or a wireless streaming device. Connecting your Android phone to a projector via a USB cable can be a convenient way to share your phone’s screen with a larger audience.
Whether you’re giving a presentation, showcasing photos and videos, or enjoying a movie, this guide will walk you through the necessary steps to establish a connection. By following these instructions, you’ll be able to display your phone’s content on a bigger screen without the need for additional adapters or cables. Read on to learn how to connect your Android phone to a projector using a USB cable.
TABLE OF CONTENTS
- 1 Check Phone And Projector Compatibility
- 2 Prepare The Required Hardware
- 3 Enable USB Debugging On Your Android Device
- 4 Connect The USB cable To The Projector
- 5 Configure Projector Input Source
- 6 Enable Screen Mirroring Or Projection On Your Android Device
- 7 Adjust Display Settings (If Necessary)
- 8 Start Screen Sharing Or Presentation
- 9 Disconnect And Troubleshoot (If Needed)
- 10 Optimize For Different Android Versions (If Applicable)
- 11 Frequently Asked Questions On How To Connect Android Phone To Projector Via USB Cable
- 12 Conclusion
Check Phone And Projector Compatibility
Ensure the compatibility between your Android phone and projector before connecting them via USB cable. This step is crucial to ensure a smooth and successful connection between the two devices.
To connect your Android phone to a projector via a USB cable, the first step is to make sure that your phone and projector are compatible with each other. This will ensure a seamless connection and optimal display quality. Here are some important considerations to keep in mind:
- Check the USB ports: Look for the type of USB ports on both your phone and projector. Common types include USB-C, micro USB, and HDMI. Make sure that both devices have the same type of USB port or that you have the necessary adapters to connect them.
- Verify operating system compatibility: Confirm that your Android phone’s operating system is compatible with your projector. Compatibility issues may arise if you have an older phone running on an outdated operating system.
- Research projector requirements: Some projectors may have specific requirements or limitations when it comes to connecting with Android devices. Check the user manual or visit the manufacturer’s website to gather information about any specific compatibility requirements.
- Consider MHL support: Mobile High-Definition Link (MHL) is a technology that allows you to connect your Android phone to a projector via a USB cable. However, not all phones support MHL. Check if your phone supports MHL and if your projector is MHL-enabled.
- Look for HDMI support: HDMI support is another factor to consider if your projector and phone both have HDMI ports. HDMI offers high-quality audio and video transmission, resulting in a better projection experience.
- Research compatible apps: Some projectors require specific apps to be installed on your Android phone for seamless connectivity. It is advisable to check if there are any recommended apps mentioned in the projector’s documentation or on the manufacturer’s website.
- Test for compatibility: Before making any purchase, it is a good idea to test the compatibility between your phone and the projector. Borrow a similar projector from a friend or check if any local electronics store has a compatible one to test with.
- Consider firmware updates: Firmware updates from the projector manufacturer may enhance compatibility with different phone models and operating systems. Check if your projector has the latest firmware installed to ensure the best possible compatibility.
- Research online forums and customer reviews: Online forums and customer reviews can provide insights into the compatibility experiences of other users. Look for feedback from people who have successfully connected an Android phone to a projector similar to yours.
- Consult with experts: If you are still unsure about the compatibility of your phone and projector, consult with experts or reach out to customer support representatives for both your phone and projector brands. They can provide guidance based on technical specifications.
Ensuring compatibility between your Android phone and projector is essential for successfully connecting them via USB. By considering the factors discussed above, you’ll be on your way to enjoying your favorite content on the big screen.

Prepare The Required Hardware
To connect your Android phone to a projector via a USB cable, the first step is to gather the necessary hardware. This includes an Android phone, a USB cable, and a projector that supports USB connectivity.
Connecting your Android phone to a projector via a USB cable is a convenient way to display your phone’s content on a bigger screen. Whether you want to share photos, and videos, or even play mobile games, this method can enhance your viewing experience.
In this post, we will guide you on how to connect your Android phone to a projector using a USB cable. So, let’s get started!
To connect your Android phone to a projector via USB cable, you will need a few essential pieces of hardware. Here’s what you’ll need:
- USB OTG Cable: This cable allows you to connect your phone to external devices like projectors. Ensure that the cable is compatible with your Android phone model.
- Projector: It’s important to have a projector that supports USB connectivity. Check the specifications of your projector to ensure it has a USB input port.
Now that you have the necessary equipment, let’s move on to the next step.
Enable USB Debugging On Your Android Device
To connect your Android phone to a projector via a USB cable, you first need to enable USB debugging on your device. Here’s a simple guide to help you out.
How To Connect Android Phone To Projector Via USB Cable:
Before you can connect your Android phone to a projector using a USB cable, you need to enable USB debugging on your device. USB debugging allows you to establish a direct connection between your phone and a computer for testing and development purposes.
Here are the steps to enable USB debugging on your Android device:
- Access Developer Options on Your Android Device:
- Go to the Settings menu on your Android phone.
- Scroll down and tap on “About phone” or “About device.”
- Look for the “Build number” or “Software information” section.
- Tap on the build number or software information 7 times consecutively to enable Developer Options.
- You will receive a message indicating that you are now a developer.
- Enable USB Debugging:
- Go back to the Settings menu.
- Scroll down and tap on “Developer Options” or “Developer settings.”
- Toggle on the switch or checkbox next to “USB debugging” to enable it.
- If you see a pop-up warning about the potential risks of enabling USB debugging, click “OK” to proceed.
- Your Android device is now ready for USB debugging.
- Connect Your Android Phone to the Projector:
- Now that USB debugging is enabled on your Android device, you can connect it to the projector using a USB cable.
- Plug one end of the USB cable into the USB port on the projector.
- Plug the other end of the USB cable into the USB port on your Android device.
- Once connected, your Android phone should automatically detect the projector and display the mirrored screen.
Remember, enabling USB debugging on your Android device is essential for establishing a connection between your phone and a projector via a USB cable. It opens up possibilities for presenting, sharing content, or even just enjoying a larger display for your mobile device.
Connect The USB cable To The Projector
To connect your Android phone to a projector via USB cable, simply plug in the USB cable to the projector and your phone. This allows you to enjoy content from your phone on a larger screen for presentations or entertainment purposes.
Connecting your Android phone to a projector via a USB cable can offer a convenient and straightforward way to share your screen and display content on a larger scale. In this section, we will guide you through the process of connecting the USB cable to the projector, enabling you to enjoy your Android device’s display on a big screen.
Follow the steps below to get started:
- Identify the USB ports: Locate the USB port on your Android phone and the corresponding USB port on the projector. These ports are usually labeled and can be found on the sides or the back of the devices.
- Get the right cable: Ensure that you have an appropriate USB cable that is compatible with both your Android phone and the projector. Most projectors support USB Type-A or USB Type-C connections, so make sure you have the correct cable for your specific devices.
- Power off the devices: Before connecting the USB cable, it is recommended to power off both your Android phone and the projector. This helps ensure a proper connection and prevents any potential issues.
- Connect the USB cable: Take one end of the USB cable and insert it into the USB port on your Android phone. Then, locate the USB port on the projector and connect the other end of the cable to it. Make sure the cable is securely plugged in on both ends.
- Power on the devices: Once the USB cable is connected, power on both your Android phone and the projector. Allow a few moments for the devices to recognize each other and establish the connection.
- Select the correct input/source: On the projector, navigate to the input/source settings. Choose the appropriate USB input/source, which should correspond to the USB port you connected the cable to.
- Adjust the display settings: On your Android phone, go to the settings and find the display or screen mirroring options. Select the appropriate setting to mirror or extend your phone’s screen onto the projector.
- Start projecting: Once the display settings are configured, you should see your Android phone’s screen mirrored or projected onto the projector. You can now navigate your phone and view the content on the big screen.
Remember, the exact steps may vary slightly depending on your Android phone model and the projector you are using. Consult the user manual or the manufacturer’s website for specific instructions if needed.
Enjoy the convenience and versatility of connecting your Android phone to a projector via a USB cable. This method allows you to effortlessly showcase your phone’s content on a larger screen, making it ideal for presentations, sharing videos or photos, and enhancing your overall viewing experience.
Follow the steps outlined in this section to connect the USB cable to the projector successfully, and get ready to enjoy a bigger and more immersive display.
Configure Projector Input Source
Learn how to connect your Android phone to a projector via a USB cable by configuring the projector input source. Follow these steps to enjoy seamless display and share content effortlessly.
To connect your Android phone to a projector via a USB cable, you need to configure the projector’s input source correctly. Follow these steps:
- Turn on the projector and make sure it is connected to a power source.
- Locate the input source button on the projector’s remote control or on the projector itself.
- Press the input source button to access the input source menu.
- Use the arrow keys on the remote control or the navigation buttons on the projector to navigate through the input source options.
- Select the USB input source option. This may be labeled as “USB” or “USB Display.”
- Once the USB input source is selected, connect one end of the USB cable to your Android phone and the other end to the USB input port on the projector.
- Your Android phone screen should now be mirrored on the projector screen.
- If the screen does not appear on the projector, check the USB cable connection and make sure it is securely plugged in.
- Some projectors may require additional software or settings on your Android phone. Consult the projector’s user manual or manufacturer’s website for any specific instructions.
- You are now ready to enjoy your Android phone’s content on the big screen through the projector.
Remember, the specific steps may vary depending on the projector model and Android phone you are using. Always refer to the user manuals or manufacturer’s instructions for accurate guidance.
Now that you have successfully configured the projector input source, you can proceed to the next step of connecting your Android phone to a projector via a USB cable.
Enable Screen Mirroring Or Projection On Your Android Device
Learn how to easily connect your Android device to a projector using a USB cable, enabling screen mirroring and projection for seamless presentations or entertainment. Simply follow these step-by-step instructions to enjoy the convenience of sharing your phone’s screen on a larger display.
To connect your Android phone to a projector via a USB cable, you need to enable screen mirroring or projection on your device. Here’s how you can do it:
- Go to the Settings on your Android device.
- Look for the option “Display” or “Screen mirroring” and tap on it.
- Depending on your device, you may find the option under the “Connected devices” or “Wireless display” section.
- Once you find the screen mirroring or projection option, enable it.
- Your device will start searching for available devices to connect to.
- Connect your Android device to the projector by selecting it from the list of available devices.
- You may be prompted to enter a PIN or verify the connection on both the device and the projector.
- Once the connection is established, your Android device’s screen will be mirrored or projected onto the projector.
Please note that the exact steps may vary slightly depending on the Android version and device manufacturer. Additionally, some projectors may require specific apps or software for screen mirroring. Make sure to follow the instructions provided by the projector manufacturer for best results.
Now that you know how to enable screen mirroring or projection on your Android device, you can easily connect it to a projector via a USB cable and enjoy sharing your content on a larger screen.
Adjust Display Settings (If Necessary)
To connect your Android phone to a projector via a USB cable, adjust the display settings if necessary. This will ensure optimal viewing quality and compatibility between the two devices.
If your Android phone is connected to a projector via a USB cable and you notice any issues with the display, you might need to make some adjustments to the display settings. These adjustments can help ensure that the projected image is clear and properly aligned.
Here are some steps to follow:
- Open the “Settings” app on your Android phone.
- Scroll down and tap on “Display” or “Display & brightness”.
- Look for the “Screen Resolution” or “Resolution” option and tap on it.
- Select the appropriate resolution for your projector. Usually, a higher resolution will result in a clearer image, but make sure it is compatible with the projector’s capabilities.
- If available, adjust the screen size or aspect ratio to match the projection screen using the “Screen Size” or “Projection Size” option. This will ensure that the entire image is displayed correctly.
- If the image appears distorted or stretched, check for options like “Screen Zoom” or “Zoom Mode” and adjust them accordingly.
- Some projectors may have specific settings for color, saturation, or sharpness. If needed, navigate to the “Advanced” or “Display” settings to tweak these options for optimal image quality.
- If the projected image does not fill the entire screen or goes beyond the edges, you can try enabling the “Screen Mirroring” or “Screen Expansion” feature, which will scale the image to fit the screen without distortion.
- It’s also worth checking if there are any additional settings on the projector itself that can be adjusted to enhance the display quality. Refer to the projector’s user manual for specific instructions.
Remember, the steps mentioned above may vary slightly depending on the Android phone model and version of the operating system you are using. It’s always a good idea to refer to your phone’s user manual or search for specific instructions online if you encounter any difficulties.
By adjusting the display settings as necessary, you can ensure that the connection between your Android phone and projector is optimized for the best possible viewing experience.
Start Screen Sharing Or Presentation
Learn how to easily connect your Android phone to a projector using a USB cable and start screen sharing or presenting your content with just a few simple steps. Enjoy hassle-free connectivity and share your phone’s screen with a larger audience.
So, you’ve successfully connected your Android phone to a projector via a USB cable. Now, it’s time to start screen sharing or giving a presentation. Follow the steps below to get started:
- Open the display settings: On your Android phone, go to the settings menu and search for “display” or “screen mirroring.” Tap on the option that allows you to adjust display settings.
- Enable screen mirroring: Look for the option to enable screen mirroring or screen sharing. Toggle it on to activate the feature.
- Select the projector: Once the screen mirroring is enabled, your Android phone will start searching for available devices to connect to. Locate and select the name of the projector you want to connect to from the list of available devices.
- Authenticate the connection: In some cases, you may need to enter a passcode or PIN displayed on the projector screen to authenticate the connection. Follow the on-screen instructions to complete the authentication process.
- Start sharing your screen: Once the connection is established, your Android phone’s screen will be mirrored on the projector. You can now start sharing your screen or giving a presentation.
Remember to have your content ready and prepared on your phone before starting the screen sharing or presentation. Whether it’s a PowerPoint presentation, photos, or videos, ensure that everything is organized and readily accessible for a seamless presentation experience.
And there you have it! You’re now ready to share your Android phone’s screen or deliver a presentation using a projector connected via a USB cable. Enjoy the convenience of showcasing your content on a larger display and impressing your audience.
Disconnect And Troubleshoot (If Needed)
To connect your Android phone to a projector via a USB cable, make sure to first disconnect any previous connections and troubleshoot if necessary. This ensures a smooth and hassle-free setup experience.
When you’re finished using your Android phone with a projector via USB cable, it’s important to disconnect properly to avoid any issues in the future. Additionally, if you encounter any problems during the connection process, troubleshooting can help resolve them.
Here are the steps to disconnect and troubleshoot if needed:
Disconnecting From The Projector:
- Locate the USB cable connected to your Android phone and the projector.
- Gently unplug the USB cable from both devices to disconnect them.
Troubleshooting Steps:
- Ensure that the USB cable is properly connected to both the Android phone and the projector. Reconnect if necessary.
- Check the USB port on both devices for any dirt or debris that may be obstructing the connection. Clean the ports carefully if needed.
- Restart both your Android phone and the projector to refresh their settings.
- Verify that the USB cable you’re using is in good condition and not damaged. Try using a different USB cable to rule out any cable-related issues.
- Make sure that the projector is compatible with connecting to an Android phone via USB. Refer to the projector’s user manual or contact the manufacturer for further information.
- Check if your Android phone requires any specific settings to enable USB connectivity with a projector. Consult your phone’s user manual or online support resources for guidance.
- Update the firmware of both your Android phone and the projector to the latest versions. Software updates can often fix bugs and improve compatibility.
- If you’re still experiencing issues, consult the support resources provided by your Android phone and projector manufacturers. They may have additional troubleshooting tips or be able to provide personalized assistance.
Remember, disconnecting correctly and troubleshooting any problems when connecting your Android phone to a projector via USB cable can ensure a smooth experience and help you make the most out of your multimedia presentations or content-sharing sessions.
Optimize For Different Android Versions (If Applicable)
Connect your Android phone to a projector via a USB cable and optimize for different Android versions. Enjoy seamless presentations and share content effortlessly with this simple method.
To ensure seamless connectivity between your Android phone and the projector using a USB cable, it’s crucial to consider the different Android versions and their corresponding requirements. Here are some key points to help you optimize your setup for various Android versions:
- Android 4.0 and below:
- Connect the USB cable to your phone’s micro USB port.
- Use an HDMI adapter to connect the other end of the USB cable to the projector.
- Adjust the projector’s input source to HDMI to display your phone’s screen.
- Check if any driver installation is required for your specific phone model.
- Android 4.1 to 6.0:
- Connect the USB cable to your phone’s micro USB or USB-C port, depending on your device.
- Use an HDMI adapter if needed to connect the USB cable to the projector.
- Change the projector’s input source to HDMI to see your Android phone’s screen.
- Verify if any additional settings need adjustment on your phone for projection.
- Android 7.0 and above:
- Connect your phone to the projector using a USB-C to HDMI cable directly.
- Ensure that the projector is set to the correct input source (HDMI).
- Your Android phone will automatically detect the connection and mirror the screen on the projector.
- In case of any issues, check if there are specific display settings on your Android phone for projection.
Remember that while the instructions above cover the broad scope of Android versions, there might be slight variations depending on the make and model of your phone. Refer to your phone’s user manual or manufacturer’s website for specific guidance if needed.
By optimizing for different Android versions, you can enjoy hassle-free connectivity between your phone and projector for a seamless multimedia experience.
Frequently Asked Questions On How To Connect Android Phone To Projector Via USB Cable
Can You Connect the Phone To the Projector Via USB?
Yes, you can connect your phone to a projector via USB.
How Do I Connect My Android Phone To A Projector?
To connect your Android phone to a projector, follow these steps: 1. Check if your phone supports screen mirroring or HDMI output. 2. Get an HDMI adapter or a wireless display adapter. 3. Plug the adapter into your phone’s charging port or connect it wirelessly.
4. Connect the other end of the adapter to the projector using an HDMI cable. 5. Set the projector input source to HDMI. 6. Start screen mirroring on your phone or adjust the display settings as needed. 7. Your phone’s screen will now be projected onto the projector.
8. Enjoy your content on the big screen!
What Cable Connects Android Phone To Projector?
An Android phone can be connected to a projector using an HDMI cable or a USB-C to HDMI adapter.
Which Cable Is Used To Connect the Mobile And Projector?
The cable used to connect a mobile and projector is called a mobile projector cable.
Conclusion
Connecting your Android phone to a projector via a USB cable opens up a world of possibilities. With this simple and convenient method, you can easily share your phone’s screen with a larger audience for presentations, gaming, and more. Whether you’re in a professional setting or simply want to enjoy a movie night at home, this connection option allows you to display your phone’s content in a clear and seamless way.
By following a few easy steps, you can connect your Android phone to a projector with minimal hassle. Remember to check the compatibility between your phone and the projector, and make sure you have the necessary adapters or cables. With the right setup, your Android phone can become a powerful tool for sharing and engaging with others.
So go ahead, connect your Android phone to a projector and enjoy the bigger picture.

