Discover the Best Way to Mount a Short Throw Projector on Ceiling
Yes, you can mount a short throw projector on the ceiling for an optimal viewing experience. When installing the projector, ensure it is positioned at the right distance and angle to create a clear and focused image on the screen.
Mounting the projector on the ceiling provides a space-saving solution and avoids any obstructions that may hinder the projection. By securely fixing the projector to the ceiling, you can enjoy a high-quality, immersive cinematic experience right in your own home or office.
Whether for presentations or home entertainment, mounting a short throw projector on the ceiling is a convenient and effective option.
TABLE OF CONTENTS
- 1 Introduction To Ultra-Short-Throw Projectors
- 2 Benefits Of Ceiling Mounting
- 3 Understanding Ultra-Short-Throw Projection
- 4 Ceiling Mount Compatibility
- 5 Installation Process
- 6 Optimal Projection Setup
- 7 Considerations And Limitations
- 8 Where Should An Ultra-Short-Throw Projector Be Placed?
- 9 Frequently Asked Questions For Can You Mount A Short Throw Projector On Ceiling?
- 10 Conclusion
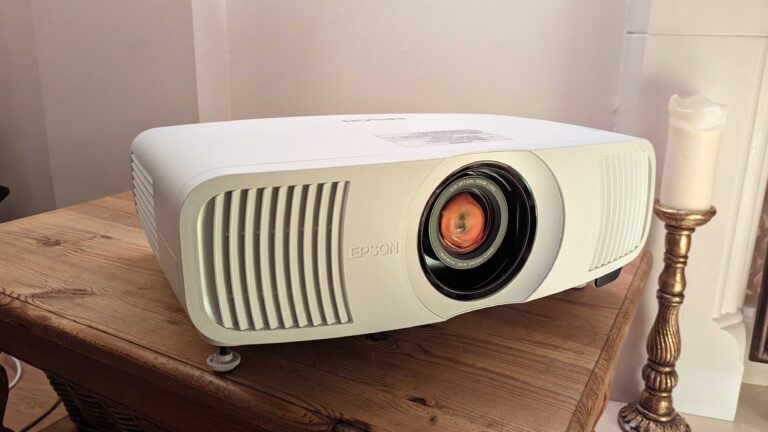
Introduction To Ultra-Short-Throw Projectors
Ultra-short-throw projectors offer versatile mounting options by giving you the ability to mount them on the ceiling. This allows for a clutter-free setup and maximizes space utilization while providing an immersive viewing experience.
Can You Mount A Short Throw Projector On Ceiling?
If you’re considering setting up a home theater or upgrading your office conference room, you might be wondering if you can mount a short throw projector on the ceiling. Well, the good news is that you can! We’ll explore everything you need to know about ultra-short-throw projectors and how to mount them on the ceiling for the best viewing experience.
Ultra-short-throw projectors are becoming increasingly popular due to their ability to deliver large, high-quality images in tight spaces. Unlike traditional projectors, which need plenty of distance between the projector and the screen to avoid image distortion, ultra-short-throw projectors can be placed close to the screen or wall without losing image quality.
Here are some key points to know about ultra-short-throw projectors:
- Shorter throw distance: Ultra-short-throw projectors have a throw distance of around 0.1 to 0.5 meters (4 to 20 inches), allowing them to be positioned just a few inches away from the screen or wall.
- Reduced shadow interference: Since the projector is mounted closer to the screen, the chance of casting shadows on the projected image is drastically reduced.
- Wide viewing angle: Ultra-short-throw projectors provide a wider viewing angle, ensuring that everyone in the room can enjoy a clear and immersive viewing experience.
- Space-saving: With their compact size and minimal throw distance, ultra-short-throw projectors are perfect for small rooms or areas with limited space.
- Easy installation: Mounting an ultra-short-throw projector on the ceiling is a straightforward process that can be done by following a few simple steps.
Now that you have a brief introduction to ultra-short-throw projectors, let’s dive into the details of mounting them on the ceiling.
Benefits Of Ceiling Mounting
Short throw projectors can be easily mounted on the ceiling, offering numerous benefits. Ceiling mounting provides a space-saving solution, enhances viewing angles, and eliminates the risk of shadows or obstructions caused by people passing in front of the projector. Whether for classrooms, conference rooms, or home theaters, ceiling mounting is a convenient and efficient option.
Mounting A Short Throw Projector On The Ceiling:
If you’re considering installing a short throw projector, you might be wondering whether it can be mounted on the ceiling. The good news is, yes, you can mount a short throw projector on the ceiling! In fact, there are several benefits to ceiling mounting that make it a popular choice among projector enthusiasts.
Let’s explore these advantages in more detail:
Increased Floor Space Utilization:
- Ceiling mounting your short throw projector frees up valuable floor space in your room, creating a cleaner and more organized environment. This is particularly beneficial for smaller spaces where floor space is limited.
- By mounting the projector on the ceiling, you can avoid the need for additional furniture or stands to hold the projector, making the room feel more spacious and uncluttered.
- Additionally, ceiling mounting allows for better furniture rearrangement options, giving you more flexibility in designing your space.
Enhanced Viewing Experience:
- Ceiling mounting offers an optimal projector placement for an immersive viewing experience. By positioning the projector above the audience, you can avoid obstructed views and reduce the chances of shadows cast by people walking in front of the screen.
- With the projector mounted on the ceiling, the image is projected at an ideal angle onto the screen, resulting in a better visual experience for everyone in the room.
- Moreover, ceiling mounting provides a consistent and stable projection setup, ensuring that the image remains sharp and focused.
Reduced Screen Glare And Eye Strain:
- Ceiling mounting your short throw projector eliminates the risk of screen glare caused by natural or artificial light sources. Since the projector is mounted overhead, it minimizes the chances of light interference and maintains a clear image.
- By avoiding screen glare, you can watch movies, and presentations, or play games for longer periods without experiencing eye strain. This is especially crucial for prolonged viewing sessions or business presentations.
Neater Cable Management:
- Ceiling mounting allows for neater cable management since the projector cables can be hidden along the ceiling or through channels specifically designed for this purpose.
- Concealing the cables not only enhances the aesthetics of the room but also reduces the risk of tripping hazards, ensuring a safer environment for everyone.
- Additionally, organized cable management makes troubleshooting, maintenance, and future upgrades more convenient and hassle-free.
Mounting a short throw projector on the ceiling has several benefits, including increased floor space utilization, enhanced viewing experience, reduced screen glare and eye strain, and neater cable management. By opting for ceiling mounting, you can create a more visually appealing, spacious, and functional setup for your projector, whether it’s for home entertainment or professional presentations.
Understanding Ultra-Short-Throw Projection
Ultra-short-throw projectors can be ceiling mounted, making them versatile for various room setups. These projectors provide a large, high-quality image even when placed close to the screen or wall, eliminating the need for extensive space. Opting for a ceiling mount allows for a clutter-free and convenient installation.
Have you ever wondered if it’s possible to mount a short-throw projector on the ceiling? In this section, we will delve into the concept of ultra-short-throw projection, exploring everything you need to know about this technology. Whether you want to save space or avoid shadows on the screen, understanding ultra-short-throw projection is key.
Let’s dive in:
What Is Ultra-Short-Throw Projection?
Ultra-short-throw projection refers to a technology that allows you to project an image onto a screen from a very short distance. Unlike traditional projectors that require a significant distance between the projector and the screen, ultra-short-throw projectors can be placed just inches away, or even right against, the screen or wall.
This proximity offers several advantages, making ultra-short-throw projectors a popular choice for home theaters, classrooms, and small spaces.
Here are some key points to know about ultra-short-throw projection:
- Enhanced Convenience: With ultra-short-throw projectors, you can avoid the hassle of dealing with long cables and finding the perfect spot for the projector in your room. By mounting it on the ceiling, you can free up floor space and achieve a cleaner, more organized setup.
- Reduced Shadows: One of the main advantages of ultra-short-throw projection is the elimination of shadows that can obstruct the image quality. When the projector is mounted on the ceiling, it projects the image downward, preventing any interference from objects or people passing in front of the screen.
- Flexibility in Placement: Ultra-short-throw projectors offer greater flexibility in terms of placement options. Mounting the projector on the ceiling allows you to achieve a more optimal projection angle and distance, ensuring a clear and sharp image without distortion.
- Space-Saving Solution: If you have limited space in your room or prefer a streamlined setup, mounting an ultra-short-throw projector on the ceiling is an excellent solution. By doing so, you can keep your floor space clutter-free while still enjoying a large projection screen.
- Different Mounting Options: There are various mounting options available for ceiling installation, such as specially designed projector mounts or brackets. These accessories provide secure and adjustable solutions to ensure the projector is safely mounted and aligned for optimal viewing.
Now that you have a better understanding of ultra-short-throw projection, you can confidently explore the option of mounting a short-throw projector on the ceiling. With its many advantages, this setup can enhance your viewing experience while maximizing the space in your room.
So, if you’re looking to create a seamless and immersive projection setup, consider the possibilities offered by ultra-short-throw projectors and ceiling mounting.
Ceiling Mount Compatibility
Short throw projectors can be mounted on the ceiling, making it convenient and space-saving for your home theater setup. Enjoy immersive cinematic experiences without the need for a separate stand or table.
Mounting a short throw projector on the ceiling can be an excellent option for saving space and achieving optimal image projection. However, it’s essential to consider the compatibility of the projector with a ceiling mount. Here’s what you need to know:
Benefits Of Ceiling Mounting:
- Enhanced space utilization: Mounting your short throw projector on the ceiling frees up valuable floor space, making the room more versatile and organized.
- Optimal viewing experience: Mounting the projector on the ceiling allows you to project the image at the perfect height and angle for an immersive viewing experience.
- Reduced obstruction: With the projector mounted on the ceiling, there are fewer obstacles in the line of sight, resulting in a clear and unobstructed image.
- Better stability: Ceiling mounts provide a secure and stable platform for your projector, minimizing the risk of accidental damage or misalignment.
- Easy installation: Most short throw projectors come with universal mounting patterns that are compatible with various ceiling mount options, simplifying the installation process.
Types Of Ceiling Mounts:
When it comes to ceiling mounts for short throw projectors, you’ll find a few different options available:
- Fixed ceiling mounts: These mounts are the most common and provide a stable and permanent solution for ceiling mounting. They hold the projector rigidly in place and are suitable for installations where the projector’s position won’t need frequent adjustment.
- Adjustable ceiling mounts: If you require flexibility in positioning the projector, adjustable ceiling mounts are a great choice. They allow you to tilt or swivel the projector, making it easier to align the image with the projection surface.
- Telescoping ceiling mounts: These mounts are ideal for situations where the distance between the projector and the projection surface needs to be adjusted. They offer adjustable height options, allowing you to customize the projection setup.
Considerations For Ceiling Mounting:
Before mounting your short throw projector on the ceiling, keep the following factors in mind:
- Weight capacity: Ensure that the ceiling mount you choose can safely support the weight of your projector.
- Compatibility: Check if the ceiling mount is compatible with your specific make and model of short throw projector.
- Ceiling type: Different ceiling types may require specific mounting techniques or additional hardware for installation.
- Cable management: Consider how you will manage the cables running from your projector to the source devices. Some ceiling mounts offer built-in cable management systems for a tidy setup.
By considering these factors and selecting the appropriate ceiling mount, you can successfully mount your short throw projector on the ceiling to enjoy a fantastic viewing experience without compromising space or aesthetics.
Installation Process
Yes, you can mount a short throw projector on the ceiling. This provides a convenient installation process, creating an immersive viewing experience without taking up valuable floor space.
Mounting a short throw projector on the ceiling can be a great way to maximize your viewing experience while saving space in your room. Before you begin the installation process, make sure you have all the necessary tools and equipment handy.
Here’s a step-by-step guide to help you through the process:
- Determine the optimal projector placement: Find the ideal spot on the ceiling where you want to mount the projector. Consider factors such as the projector’s throw distance, screen size, and viewing angle.
- Prepare the mounting location: Ensure the ceiling is strong enough to support the weight of the projector. Locate a stud or use a ceiling mount kit to securely attach the mount.
- Install the ceiling mount: Attach the ceiling mount to the designated spot on the ceiling. Follow the manufacturer’s instructions for proper installation. Use a level to ensure the mount is perfectly straight.
- Attach the projector to the mount: Most ceiling mounts come with adjustable brackets that securely hold the projector. Align the projector with the mount’s brackets and use the provided screws to secure it in place.
- Connect the necessary cables: Depending on your setup, connect the projector to your video source, audio system, and power source. Use appropriate cables and ensure a snug connection.
- Adjust the projector: Fine-tune the projector’s position and angle to achieve the desired image size and clarity. Use the projector’s adjustable lens shift, zoom, and focus features to optimize the projection.
- Test the projection: Power on the projector and test the image projection to ensure everything is working as intended. Make any necessary adjustments to the image quality or projector position.
- Manage cables: Conceal and secure the cables running from the projector to avoid any tripping hazards or unsightly clutter. Consider using cable management solutions or running cables through walls or ceilings if possible.
- Calibrate the projector: Use the projector’s built-in calibration features or a calibration tool to optimize the image settings, such as brightness, contrast, color saturation, and sharpness.
- Enjoy your setup: Once you’re satisfied with the projector’s positioning and image quality, sit back and enjoy your favorite movies, shows, or presentations in an immersive and space-saving setup.
Remember, it’s essential to consult the projector’s user manual and follow the manufacturer’s instructions throughout the installation process. With a properly mounted short throw projector on your ceiling, you can elevate your viewing experience to new heights.
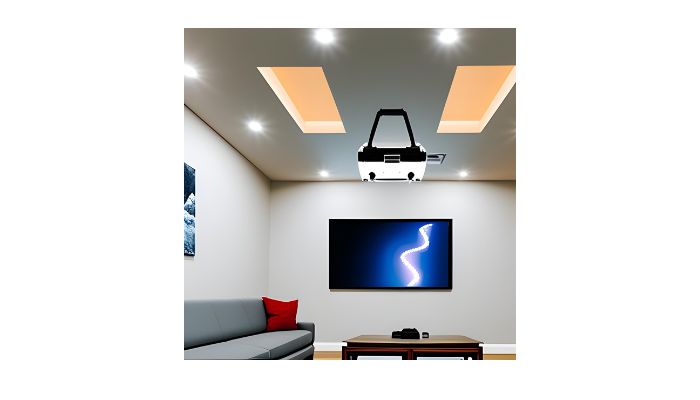
Optimal Projection Setup
Mounting a short throw projector on the ceiling provides an optimal projection setup, allowing for a clear and immersive viewing experience. With the projector positioned closer to the screen, it delivers larger images in smaller spaces, eliminating the need for excessive distance between the projector and the screen.
Mounting a short throw projector on the ceiling can be a smart choice for achieving an optimal projection setup in your space. By mounting the projector above your viewing area, you can take advantage of the short throw feature to enjoy a large, clear image without any obstructions.
Here are some key considerations to keep in mind when setting up a short throw projector on the ceiling:
- Ceiling Mount: Investing in a reliable ceiling mount is essential for securely mounting your short throw projector. Look for a mount that is compatible with your specific projector model and offers adjustable settings for optimal positioning.
- Distance Calculation: To ensure the best image quality and size, it’s important to calculate the distance between the projector and the screen or wall. Most short throw projectors come with a throw ratio specification, which helps determine the required distance for your desired screen size.
- Ceiling Height: Take into account the height of your ceiling when planning your projector setup. A higher ceiling may require additional adjustments, such as using extension poles or mounts with adjustable angles, to achieve the desired projection angle and distance.
- Screen Placement: Consider the placement of your projection screen or wall. Ensure that it is directly across from the projector and positioned at the appropriate height for comfortable viewing. You may need to adjust the mount or screen height to align with your projector’s throw angle.
- Cable Management: Proper cable management is crucial for both aesthetics and functionality. Use cable management solutions like cable covers or conduit to neatly route your power and video cables from the projector to the source devices.
- Projection Surface: Choose a suitable projection surface that complements your projector’s capabilities. A white or gray screen with a high-gain material can enhance image brightness and contrast, while ambient light rejecting screens are ideal for rooms with lots of natural light.
- Tilt and Keystone Correction: Ensure that your ceiling mount allows for tilt adjustment to achieve a leveled projection image. In addition, some short throw projectors offer keystone correction features to rectify any image distortion caused by the angle of projection.
- Ventilation and Heat Dissipation: Short throw projectors generate heat during operation, so it’s important to ensure proper ventilation to prevent overheating. Consider the projector’s ventilation requirements and maintain adequate airflow around the unit.
- Professional Installation: If you are unsure about the installation process or require a complex setup, it is advisable to seek professional assistance. Professional installers can ensure that your projector is mounted securely and provide expert advice on optimizing the projection setup for your specific needs.
Now that you have a better understanding of the optimal projection setup for mounting a short throw projector on the ceiling, you can confidently create a captivating and immersive viewing experience in your space. Take the necessary measurements, invest in the right equipment, and enjoy the benefits of a ceiling-mounted short throw projector.
Considerations And Limitations
Mounting a short throw projector on the ceiling involves considerations and limitations. Ensure proper placement and compatibility for optimal projection.
Mounting a short throw projector on the ceiling can be a convenient option for those looking to save space or achieve optimal viewing angles. However, there are several considerations and limitations to keep in mind before making this decision. Let’s explore them below:
- Projection Distance: Short throw projectors are designed to project from a close distance. Before mounting the projector on the ceiling, ensure that the throw ratio is suitable for your space. Measure the distance between the projector and the screen to determine compatibility.
- Ceiling Height: The ceiling height plays a crucial role in determining if a short throw projector can be mounted. Consider whether the projector’s throw angle aligns with your room’s dimensions. Measure the vertical distance from the ceiling to the desired projection area.
- Mounting Options: Short throw projectors typically come with ceiling mount options that allow you to fix them securely. Look for a compatible ceiling mount that provides proper support for your projector model. Check the maximum weight capacity of the mount to ensure it can handle the projector’s weight.
- Installation and Wiring: Installing a ceiling-mounted projector involves drilling holes and running cables through the ceiling. Consider the complexity of the installation process and whether you have the necessary skills or will require professional assistance. Plan for cable management to avoid unsightly wires.
- Screen Size and Placement: The size of the projected screen and its placement should be carefully considered before mounting the projector. Ensure that the projected image will fit within the desired screen area and align properly. Consider the size and position of any furniture or obstacles that may obstruct the projection.
- Heat Dissipation: Projectors generate heat, and proper ventilation is crucial to prevent overheating and ensure optimal performance. Evaluate the projector’s cooling system and verify that there is sufficient airflow in the ceiling-mounted location. Inadequate ventilation can lead to reduced lamp life and potential projector damage.
- Maintenance and Accessibility: Ceiling-mounted projectors may be challenging to access for maintenance, such as lamp replacements or adjustments. Consider how easy or difficult it will be to reach the projector on the ceiling when required. Make sure there is enough space for regular maintenance without causing disruptions.
- Structural Integrity: Before mounting a projector on the ceiling, it is important to assess the structural integrity of the ceiling. Ensure that the ceiling is strong enough to support the weight of the projector and mounting hardware. Seek professional help if you have any doubts or concerns regarding the ceiling’s ability to hold the projector.
- Room Acoustics: Mounting a short throw projector on the ceiling can impact the room’s acoustics. Consider how the placement of the projector may affect sound reflections or interfere with speaker placement. Test the audio quality in the projected area to ensure an optimal viewing and listening experience.
- Projector Alignment: Proper projector alignment is essential for achieving a clear and distortion-free image. Ensure that the projector can be easily adjusted after mounting to fine-tune the projection angle, focus, and keystone correction. Some ceiling mounts offer additional adjustment features that can aid in achieving the desired image quality.
By considering these factors and understanding the limitations, you can determine if mounting a short throw projector on the ceiling is suitable for your setup. Take the time to assess your specific requirements and consult with professionals if needed. Enjoy immersive and hassle-free viewing with your ceiling-mounted short throw projector setup.
Where Should An Ultra-Short-Throw Projector Be Placed?
An ultra-short-throw projector can be mounted on the ceiling for optimal placement, allowing for immersive viewing experiences. Avoid clutter and ensure sufficient space between the projector and the screen for maximum performance.
If you’re considering mounting a short throw projector on the ceiling, you may wonder where exactly it should be placed for optimal performance. The placement of an ultra-short-throw projector is crucial to ensure the best image quality and viewing experience.
Here are a few key factors to consider when determining the ideal placement for your projector:
Distance From The Screen:
- Position your ultra-short-throw projector at a suitable distance from the screen. This distance is typically specified by the manufacturer and can vary based on the specific model you have. Refer to the projector’s specifications to determine the recommended distance range.
Height From The Ground:
- Mounting the projector at the correct height is important to prevent any obstruction or distortion of the projected image. It is generally recommended to place the projector at a height that aligns with the center of the screen to achieve the best visual alignment.
Screen Size And Aspect Ratio:
- Consider the size and aspect ratio of the screen you’ll be using. Ensure that the projector is placed at a distance from the screen that allows for proper coverage and accurate scaling of the image.
Projection Angle:
- Pay attention to the projection angle when mounting the projector on the ceiling. Aim to position the projector in a way that minimizes the keystone effect, which can distort the image. Most projectors come with keystone correction features; however, it’s best to mount the projector as level as possible to minimize any adjustments needed.
Room Layout And Size:
- Assess the room layout and size to determine the ideal placement for your projector. Take into account factors such as the viewing distance, furniture arrangement, and potential obstacles that may affect the projector’s performance.
Remember to consult your projector’s user manual for specific guidelines and recommendations on mounting and placement. By considering these factors, you can ensure that your ultra-short-throw projector is positioned in the optimal location, providing you with a remarkable viewing experience.
Frequently Asked Questions For Can You Mount A Short Throw Projector On Ceiling?
Can Any Projector Be Ceiling Mounted?
Yes, not all projectors can be ceiling mounted. Some projectors are specifically designed for ceiling installation.
Where Should A Short Throw Projector Be Placed?
A short throw projector should be placed in front of the screen for optimal viewing experience.
Can All Projectors Be Mounted Upside Down?
Yes, most projectors can be mounted upside down for versatile installation options.
Do Short Throw Projectors Need A Special Screen?
Short throw projectors do not require a special screen.
Conclusion
So, can you mount a short throw projector on the ceiling? The answer is a resounding yes! Short throw projectors are specifically designed to be mounted on the ceiling, offering a convenient and space-saving solution for home theaters and presentations.
With their ability to project large images from a short distance, these projectors are perfect for rooms with limited space. Mounting a short throw projector on the ceiling not only eliminates the need for a dedicated table or stand, but it also ensures a more comfortable viewing experience for everyone in the room.
Plus, ceiling mounting helps to keep the projector out of the way and minimizes the risk of accidental damage. So, if you’re looking to optimize your space and create a more immersive viewing experience, mounting a short throw projector on the ceiling is definitely worth considering.